Holly Bracelet Instruction
 |
material
|
First of all, I thank Raven Willey of Howling Rabbit for sharing the Nepal chain. The following projects are a combination of this attractive stitch and other well-known techniques. I also thank Capriccio, whose page offered an excellent pictorial instruction for the beaded cube. It's an easy, fun to do project and looks quite nice.
 |
fig.1 |
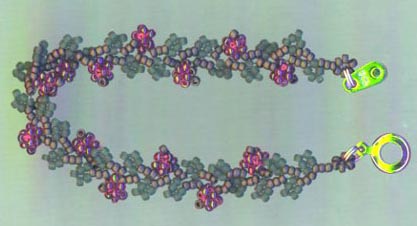
- Make as many beaded cubes as you want to attach on a bracelet, referring to
the instructions on Maria's site. These beaded cubes make the berries. I attached one berry (shown by a cluster of red beads) after every two leaves (shown by green beads in fig.1) on each side of the vine.
- String 6 brown beads, a clasp or a jump ring, and tie a knot. Go through one bead on the loop.
- String 3 brown beads, a cube, 1 brown bead. Skip the brown bead just strung,
and go back through the cube, 3 brown beads, and the bead on the loop you
came out of. (fig.2)
- Following the Nepal chain instruction on the Howling Rabbit site, make one leaf. Then, instead of going through one bead of a leaf as in the normal Nepal chain, go through one of the beads in the cube in order to secure the flower to the stem and continue to stitch. (fig.3) Keep adding leaves and berries until the bracelet is the desired length.
- Finally, add 6 brown beads and a clasp at the end of a stem. Tie a knot.
 |
 |
| fig.2 | fig.3 |
| Go to another variation: Napal chain plus Daisy chain |
|3D animals |
necklaces|
earrings|
amulet bags|
miscellaneous|
Index|